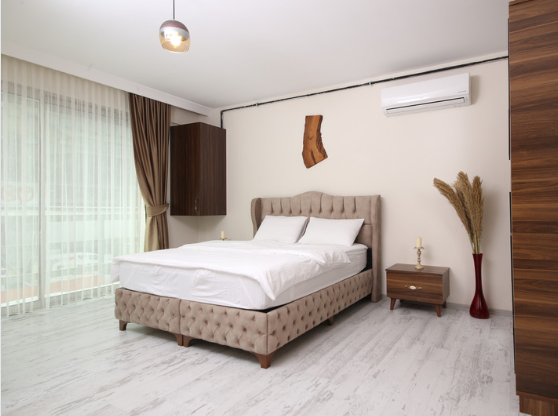
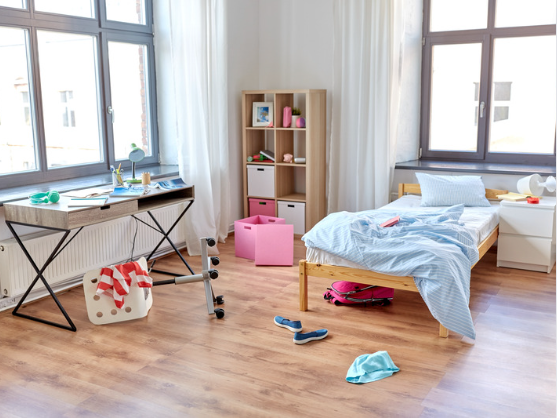
Our first tour was of a house that was almost complete but still had a week or more of finish work remaining. My wife had a hard time visualizing the final details, so I set to work making models of the completed structure. 1120 SE side I happen to enjoy using SketchUp. If I had … Continue reading Visualizing your new home
Lemongrass Oil based spray – mix ½ cup of hot water with 20-25 drops of lemongrass essential oil in a spray bottle. Spray along the windows, doors and other areas where flies reside. Lemongrass is a strong insect repellent and will keep the flies away. You can also soak cotton pads into the oil and place them around the house. And you can also use Lavender Oil which you don’t have to dilute in water. Don’t use the oils directly onto the skin though because they are too strong and can irritate it.
Herbs – basil plants, lavender, mint or rue repel flies. You can plant them next to the doorway or in window boxes and take advantage of their anti-insect powers.
These solutions work because the scent they emit is just too strong, so the flies avoid it.
Strongly scented sprays best repel ants. You can create a vinegar spray – 1:1 white vinegar to water and spray it onto their trails;
Essential oil spray – mix 25 drops of peppermint or eucalyptus oil and a cup of water; use it to spray where you see ants as well as near entrances to the house. Re-spray once the scent starts to fade away which is usually in a day or two.
These solutions work miracles because they interfere with the chemical signals ants use to communicate. Ants use special pheromones to trail their way to food so when they pass through a sprayed area, their trails get disrupted. Moreover, passing ants get covered with the spray solution and they bring it to their colony, spreading it all over which, in result, confuses all of the remaining ants as well. This way you can keep them at bay.
Mosquitoes
Lemon Eucalyptus oil is proven to be effective against pesky mosquitoes. Again, you can soak cotton pads and place them around your home, or even outside if you’re having an outdoor evening. Other essential oils also prove effective, although they have a shorter protection time in comparison to repellents that contain DEET. This only means that you need to apply them more frequently but they are still at least as effective as DEET products.
Things that are tested and proven to NOT work:
– Citronella candles
– Bracelets that contain herbal extracts
– Sonic mosquito repellers
There was a study published by the Journal of Insect Science that tested some of the most popular means of repelling mosquitoes. The study found that the above mentioned products aren’t effective at all and do not drive mosquitoes away. Now, the study didn’t investigate the reasons why some products didn’t work but my best guess as a professional who operates with insecticides is because these particular products have too little of the active ingredient that repels mosquitoes. If you’re curious, I can send you the study by the Journal of Insect Science.
At Smash.to, we all know the painful experience of dozing off on an uncomfortable mattress. We wake up more tired than we went to sleep, our bodies ache and we are unable to concentrate.
Out in the sea, it is crucial to stay sharp and think on your feet. This is why if you don’t have a quality rest, things may quickly get out of hand. Besides, a good night’s sleep ensures a better overall sailing experience.
Follow through our article and learn how to bring comfort to your boat and improve your sleep.
Choose the Right Mattress for Your Yacht
If you’re a passionate yachtsman, you probably spend most of your vacations onboard. It is important to be relaxed and well-rested during that time. To ensure that, you must have a comfortable mattress. After all, who doesn’t enjoy a good night’s sleep after a long day of sailing?
Establish your budget before you set out to search for the perfect mattress. Some may say a good night’s sleep is priceless, but for many of us, the cost is a factor. Custom mattresses, as expected, are rather expensive but there are cheaper options which may suffice for the budget-minded.
Polyurethane foam or polyfoam is similar to memory foam structurally. The main difference is that memory foam has additional chemicals added in the manufacturing process. If you are on a tight budget, this option may be the best for you. Polyurethane foam comes in various levels of firmness and density. Because of its low cost, it is a popular choice for many.
However, keep in mind that you get what you pay for. Polyfoam lacks durability, so the initial comfort quickly fades away. Another downside is that foam slab mattresses lack the support your spine needs which may lead to back ailments.
Latex Foam Mattresses
Latex mattresses are sure to provide quality sleep – and there are plenty of reasons why:
Durability – natural latex foam keeps its shape for years.
Spine stability – due to its elastic properties, latex responds to your body and reliefs pressure.
Easy to maintain.
Eco-friendly.
Hypoallergenic – The structure of the latex foam makes it resistant to dust mites. Furthermore, studies show that the material prevents mold and bacterial growth.
Like any other product, latex mattresses have a few disadvantages.
For example, some owners reviewed that the surface easily retains heat. If your mind is set on this type of mattress, consider breathable covers – form wool or cotton. They are a simple and inexpensive solution to the issue.
Also, some find latex mattresses to be rather firm. Another disadvantage is that they are quite expensive. High-quality latex foam beds cost from $1500 to $2000.
Memory Foam Mattresses
They contain layers of different densities of viscoelastic foam that respond to pressure and temperature. This type of mattress is popular for its comfort and hug-like feeling. Also, memory foam reduces pressure points and relieves pain. In addition, they are more affordable compared to latex foam mattresses.
However, some find it to be hotter to sleep on such a mattress, as the foam does not breathe as well as the other materials. It is probably not the best choice if you suffer from chronic back pain. If that’s the case, consider a more firm mattress.
Innerspring Mattresses
An innerspring mattress comprises three parts: foundation, core, and comfort layer. The bottom part of the mattress is the foundation and is typically made of wool. It is the main structure of the bed and provides support for the coils at the core. No one is comfortable sleeping on springs, so every innerspring mattress has a foam topper that serves as the comfort layer.
Some sailors prefer traditional spring mattresses because they are firm, durable, and have good ventilation. Also, they are easy to accustom to the size and shape of your yacht/boat. Innerspring mattresses are the perfect choice if you are on a tight budget.
However, there are some downsides to consider. For instance:
Increased Pressure: The coils that provide support respond with a certain force on your weight. This, in turn, accounts for uneven zones of pressure on your body. Unfortunately, this may lead to poor blood circulation and muscle pain.
Dust Mites: The layers of wool, foam, and/or fiber make a perfect environment for dust mites. If you have allergies, then an innerspring mattress might affect you.
Lack of Movement Separation: Whenever you or your partner turns during sleep it affects the whole surface of the mattress. Individually pocketed coils may provide a level of separation, but nowhere as good as memory/latex foam mattresses.
Weight: Another issue is that these mattresses are heavy and do not bend like foam ones, so it may be hard to get them in the boat.
Proper Maintenance
It is vital to keep your mattress dry. High humidity creates the perfect environment for mold and bacterial growth. A damp mattress may cause allergic reactions as well. Proper ventilation is essential to maintain good hygiene. Fortunately, there are some good ways to improve the airflow around the mattress:
Every few months flip your mattress and let it breathe for a while before you put the sheets on.
It is important to have air space under the mattress to improve ventilation. Some try to drill holes in the plywood’s top. Others prefer to use plank slats to improve the airflow.
Final Remarks
Whether you sail to relax or to boost your adrenaline, you need to be well-rested to fully enjoy the experience. To do so, consider the ideas from our article to ensure the good night’s sleep for you and your companions.
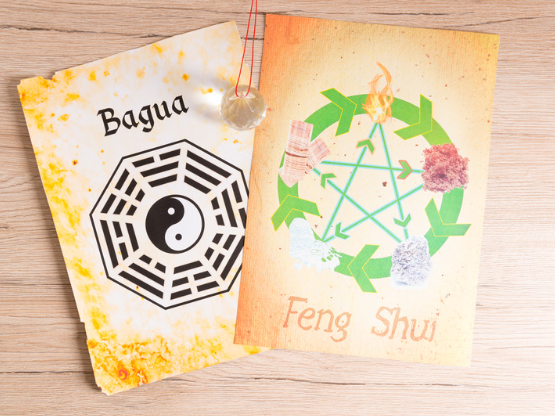
When it comes to feng shui, there are certain things you want to avoid in your bedroom if you want to create a peaceful and calming space. While you can arrange an appointment with a feng shui consultant to learn about the ancient Chinese art, many feng shui experts provide tips on what constitutes good and bad bedroom feng shui.
For the best feng shui bedroom rules, actionable feng shui bedroom tips and how to create positive energy and enjoy a restful night’s sleep while working to feng shui bedroom rules, read on.
What Is Good Feng Shui In The Bedroom?
Given feng shui is about positivity and good energy, it is helpful to consider some things which are deemed good feng shui in the bedroom.
Place Your Bed In A Commanding Position With A Straight Line To The Door
According to the principle of the commanding position, when you sit up in bed with a headboard at your back, you should be able to see the main door, but you shouldn’t be in a direct line with the door. Ideally, you should be in a diagonal position with respect to the door.
Create A Clear Pathway To And Around The Door
With energy coming in and out of doors, you want to keep a clear path to ensure energy can move freely. This is the same for every room in your house, and it’s no different for your bedroom.
Minimise Or Completely Remove Electronic Devices And Screens
A common tip for getting a good night’s sleep is to remove screens and electronic devices from the bedroom. Many people find that when they use their device shortly before bed, they are unable to unwind, relax or turn off, which means they get much less sleep than they want or need over the course of the evening.
So, even if you don’t focus on feng shui tips, there is a lot to be said for removing these devices from your bedroom. However, feng shui is quite strict on minimising these features. If you need your phone for emergencies or as an alarm clock, it stands to reason that you need it close to your bed. However, this is the exception as opposed to the rule, and if this is present in your bedroom, try to remove all other electronic gadgets and distractions.
Some of the feng shui reasons electronics are bad in the bedroom include:
Electro-magnetic fields (EMF) emanating from devices cause natural unrest
It is preferable to have yin energy in the bedroom to facilitate sleep but electrical devices, and the sound and images which arise from them are viewed as yang energy
For most people, the primary purpose of the bedroom is sleep and relaxation while electrical devices stand against this outcome
For all these reasons and a whole lot more, it is best to minimise the use of gadgets, TVs, tablets, laptops, smartphones and more from your bedroom.
Avoid Clutter, Including Family Photos, Which Create Too Much Energy
Feng shui places a considerable level of importance on removing clutter, and this includes whatever is lying beneath your bed. Now, you might find yourself struggling for storage space, and if your bed has space beneath it, it is natural and understandable for people to place items beneath their bed.
However, the teachings of feng shui indicate this clutter might cause problems for your subconscious, and this can prevent you from enjoying a great night’s sleep. An example of clutter which might mess with your subconscious is love letters or photos of a former partner. Many people like to keep mementos of former relationships, and it doesn’t necessarily mean they are unhappy in their current relationship.
However, the presence of these items might subconsciously influence how a person feels, and acts, in their current relationship.
Another factor which might have a subconscious impact on your life is placing luggage beneath the bed. This could make some people yearn for travel, which means they’ll never feel settled in their current home. There is nothing wrong with aspiring to travel, but when it comes to feeling happy and content in your house, it is best to focus on this.
Ideally, for your feng shui bedroom, you should have nothing beneath your bed, and this space should be clear. If this isn’t possible, you should only store linens and blankets beneath your bed.
Try To Detoxify Your Bedroom
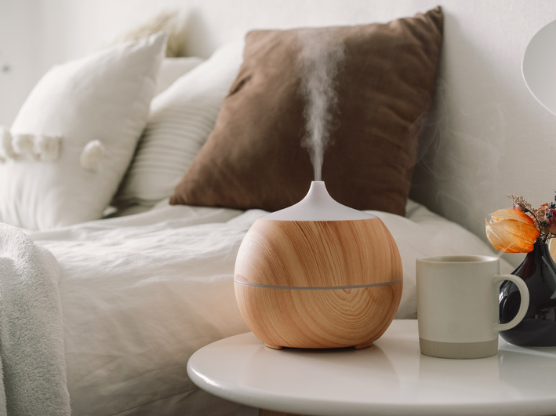
While detoxification is an important issue for many people, regardless of the feng shui benefits, it is worth considering these changes in line with a feng shui bedroom. Try to use environmentally friendly products, with organic sleepwear, linen and blankets being great examples of how you can make small changes which will have a positive impact on this space.
You can also make changes to the room’s energy by changing the smells associated with your bedroom. Many households add a diffuser or essential oils to improve the smell, and your favourite fragrance will help you feel more relaxed in this room.
Avoid Sharp Corners And Bed Points
Sharp corners are bad for any room in your home, but the space when you often walk around tired or in the dark? It is fair to say sharp corners are best minimised in the bedroom for pertinent health reasons, but with respect to a feng shui bedroom, there are reasons why sharp corners and bad points are harmful.
Harmful energy in feng shui is referred to as shar chi, and poison arrow energy is a key source of shar chi. This negative energy originates in sharp objects which point towards people and main doors. According to some feng shui specialists, poison arrows are directly linked to severe loss in life, including poor health, losing money or losing a job.
Ideally, you want to avoid these outcomes, which means you should look to minimise or cover up these points.
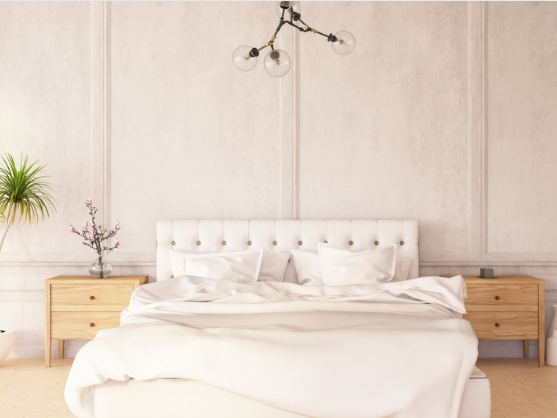
Install A Headboard For The Bed
Having a headboard at the end of your bed is ideal to enhance the sense of stability and strength in the room. If you share the bedroom with a partner, this is an important outcome, so it is easy to see why incorporating this sort of feature will have a positive impact.
While there are many styles of headboards to choose from, ideally you should look for a single piece and solid-wood headboard. You can also opt for an upholstered headboard if this works better in your room. However, you should try to avoid headboards that have perforations in them or railings.
While it is good to have this headboard close to the wall, there is a compelling argument that you should move it away from the wall. This creates space for energy to move freely around the bed, and the room in general.
Placing A Bedside Table At Either Side Of The Bed, With Equal Space
Purely for symmetrical reasons, many people like to have matching bedside tables, lights or cabinets around the bed. There is also the fact that if two people share the bedroom, they both need these features handy to their side of the bed.
Of course, as you’d expect, there are also valid reasons to have these features in your home. If you only have one table or light, there is an imbalance in the room, and this can lead to the energy being disrupted or feeling off.
Allow As Much Natural Light In, With A Window On A Sloping Ceiling Or Sloped Ceiling Being An Ideal Addition
All these steps are considered suitable ways to improve feng shui in your bedroom.
We’ll now consider bad feng shui in the bedroom in more detail, expanding on some steps which are the opposite of good feng shui, and discussing separate steps which should also be avoided.
Mirrors reflect energy, which means these are not helpful if you are looking to enjoy a good night’s sleep. If you must have a mirror in your bedroom, in the commanding position, ensure it doesn’t directly face the bed. To enjoy good feng shui in a bedroom, make sure your mirror faces something you love, so you see it in the reflection.
Technology In The Bedroom
Screens, devices and computers are classed as being bad for feng shui in the bedroom, so wherever possible, do not have or use these items here.
Of course, many sleep experts advocate not looking at electronic screens in the lead-up to bedtime, as these can prevent you from falling asleep. In many examples, feng shui tips follow common sense or good practice for behaviour around the home, and this is a perfect example where feng shui and modern health tips align.
Promote Relaxation By Removing Electronic Devices
Of course, you need to be realistic when it comes to energy flow and technological devices. Your alarm clock is a vital component of a bedroom, and many people wouldn’t feel confident about waking on time without it. So, when you feng shui your bedroom, an alarm clock won’t hamper the energy flow of your bedroom layout too much, certainly not as much as the benefits it brings.
If you oversleep every day, you’ll feel negative energy from your boss, so there are some tough decisions to make with a feng shui bedroom. There is also an argument for finding balance, so if you have a digital alarm clock, balance this by removing other gadgets such as laptops or tablets from the bedroom.
A Cluttered Bedroom Is Bad For Feng Shui So Create Uncluttered Thinking
It is easy to see why bedrooms become cluttered, especially if you are the sort of person who is always rushing to get ready for work. However, clutter is considered bad form for feng shui in any part of the house, let alone the bedroom. If you have limited space in your bedroom layout, create a clutter free environment with a huge wardrobe and drawers. As always with feng shui, be sure to avoid blocking pathways around the room, and to the bedroom door.
Family photos are a great addition to any room of your home, because they create feelings of love, and remind you why you work so hard. The bedroom is an important room, and most interior design specialists will incorporate family features here, and you don’t need to overlook or discard this when you try to capitalise on styling your bedroom effectively.
Leaving Drawers And Doors Open When Not In Use
Following on from adding storage options to your bedroom to minimise clutter, you shouldn’t leave drawers or a closet door open when they aren’t in use.
Blocking Your Bedroom Door
A clear pathway is essential for creating positive energy in feng shui rules, and for energy to flow freely. Therefore, when you block the path to your bedroom door with bedroom furniture, you foster negative energy.
The same goes for people with an en-suite who have a bathroom door or toilet door in their bedroom. You want to create a clear path to the bathroom door, as feng shui principles apply here too.
Having Your Bed Facing The Bathroom Door
The feng shui rules regarding a bed facing the bedroom door are well known, but not everyone is as clear when it comes to a bed facing a bathroom door. With a growing number of homes having an en-suite facility, there will be many households in this situation, and as you’d expect, there are feng shui guidelines to follow when it comes to a bed facing the toilet door.
Basically, it shouldn’t. Feng shui principles suggest a bed facing this door leads to health issues, and a loss of money. If you have no option but to position your bed facing this door, there are steps you can take to minimise the problem.
Leave the bathroom door closed as often as possible, which you’ll likely do for health reasons. You should also consider installing a mirror inside the bathroom door, which will help to refocus the negative energy from the bathroom back inside the room, and not into the bedroom.
A Bed Positioned Under A Sloping Ceiling
While having a sloping ceiling is helpful in allowing as much natural light into a bedroom as possible, it poses a challenge or two when it comes to styling this room. You shouldn’t position the bed beneath sloped ceilings, as this will disrupt the flow of chi here.
So, think about how you can optimally position your bed with this constraint, and the other constraints associated with feng shui.
A Bed Positioned Under A Beam
Depending on the design of your house, there might be beams running across the ceiling of your bedroom. If this is the case, try to avoid positioning your bed beneath these beams. Beams create pressure and they disrupt energy, and with beams cutting across you above you, some feng shui specialists believe this will lead to injury or harm to people sleeping beneath the beam.
If you have no option but to position your bed in this way, one solution is to position two flutes with red ribbons above the bed. The open ends of the ribbons should point upwards, as this ensures the energy from the beams float into the flutes, not you.
A Bed Beside The Window Can Disrupt Sleep
While it is helpful to have as much light in your room as possible, you don’t want it to disrupt sleeping patterns. So, try to move the bed to a position where light doesn’t flow in, so it won’t disrupt your sleep or distract you. If you place our bed closer to the wall opposite the window, you should find it is more helpful for avoiding this light.
Don’t Forget The Five Elements And The Bagua Energy Map
While there are certain aspects of bedroom feng shui to consider, there are also many general tips to consider when you feng shui your bedroom. Yes, a bed placed in the commanding position is vital, but what the five elements and what bagua represents, you can do more to create tranquillity in your own bedroom by following tips from the ancient practice.
Whether you focus on adding earth energy or cultivating a health and family area, following an energy map provides a platform to create better balanced energy in this room. The simple act of bed placement and using good quality bed linens make a huge difference.
Fire, as you’d expect, is extremely passionate, and it is also associated with fame and action. If you are keen to feel inspired and driven, a fiery red can be a great addition, but it is easy to see why many people avoid this in the bedroom.
Earth energy is linked with security and stability, things which most people crave in life, and aspects that are right at home in the bedroom. Colour-wise, browns and creams might not be overly exciting, but if you’re keen to create a grounded and humble environment, neutral colours are a brilliant choice. When it comes to accessories, crystals are a cool way to connect with earth in a bedroom.
Adding Elements To The Same Wall Will Transform The Life Force Energy Of A Property
Given that water is closely linked with purification, cleansing and prosperity, it is easy to see why many people are interested in harnessing this element. It is easy to add a water element to your home, with any water feature achieving this outcome. When it comes to colours, blue is a fantastic choice.
Given that many people find water to be soothing, it is a good element to have in your bedroom, especially if you need a calming environment to fall asleep in. Bear in mind, everyone is different and the ideal surroundings to help you sleep might be different. If you are in a relationship and you share a bedroom with someone, you will know that this is the case.
The trick is to be flexible, and to try things. There is no harm moving furniture and items around the room to see if it works for you, and whether it leads to more positive energy in this space. Unless you start changing structural elements of the home, there are few issues which cannot be changed or improved on, so feel free to experiment when creating the ideal environment which helps you relax and feel at ease in the bedroom.
Good Interior Design Can Sit Alongside The Main Element’s Energy
With metal, you have clarity and focus, and in terms of feng shui, it helps to deliver love, wealth and health. These are natural goals for most people, and are likely to feature in the bedroom for those who follow the guiding principles.
No matter where you shop, you’ll likely have metallic furniture which is capable of feeling at home in your bedroom. However, you can also add accessories which have a metallic sheen, such as throws, cushions or pillows. It is not as if you need to make your full bedroom gold or silver to tap into this outlook, you only need a couple of key features to create this identity in the bedroom.
It is not as though you can only focus on one element at a time, you can enjoy other elements at the same time. However, you want to avoid cluttering a room, and this is why it is often best to focus on a singular element, as opposed to focusing on harnessing the energy of other elements.
Wood And Water Features Create A Sense Of Life And Harness The Element’s Energy
Wood is an easy feature to incorporate into the bedroom, and given the wood element is associated with new life, creativity, growth and health, it is a fantastic way to create positive energy in a bedroom. Wooden features, and plants, work well and of course, brown is a natural choice with this style.
No matter the outcome you want to achieve in your bedroom, bearing the five elements, the associated characteristics and colours in mind will ensure you have a bedroom that a feng shui specialist loves.
Don’t forget you can use your bedroom walls to tap into these elements, either through colours, shapes, finishes or the overall sense of space in this part of your home. Just because you follow the ideals associated with this system doesn’t mean you have to drop or discard your ideas or originally. There are many ways to incorporate a sense of personality and innovation while meeting the main principles associated with creating positive energy in this part of your home.
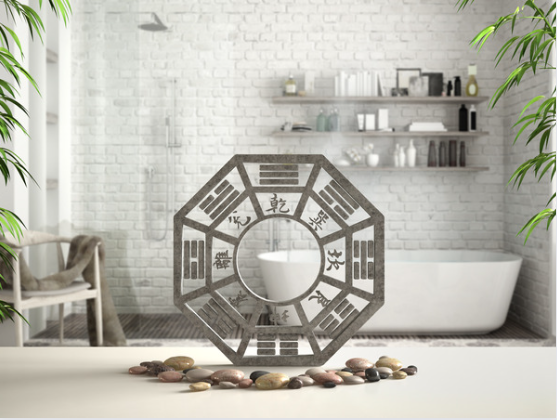
How Do The Bagua Rules Apply To The Bedroom?
One of the most important things to consider when laying out any room are the Baguas, or energy areas. Followers of feng shui will likely have this map, imposed over the floor plan of their home and in relation to their front door. Laying out your home and belongings to correspond with a chosen factor, or factors, of health and wellness can provide you with a range of improvements.
Know What The Bagua Represents In The Bedroom And Other Rooms
When laying out your bedroom, have Bagua rules in mind, but equally, bear in mind you cannot satisfy all eight areas in one go. It is best to consider which areas are most important to you, and you can tailor your room to help you achieve a positive benefit in one or a small number of these areas.
The eight Baguas are
Career
Children
Fame
Family
Health
Helpful people
Knowledge
Partnerships
Wealth and prosperity
You can impact on each area with colours, fabrics and materials, which is helpful if you are planning on decorating or styling your bedroom in a specific manner.
Whether you paint a solid wall or add artefacts to this space, you can positively impact the aesthetic appearance and energy in the room with bedroom feng shui. If you have only considered a solid wall in the bedroom as a place for storage shelves or art which will promote relaxation, it is time to think about what feng shui can do for you.
For example, if you want to enhance the master bedroom, and the key relationship in the house, you have a number of great options to consider. Earthy and neutral colours are effective in developing this area of your life, as are green plants. You can also consider the use of strong shapes, with squares and triangles being a good addition to the style of your bedroom.
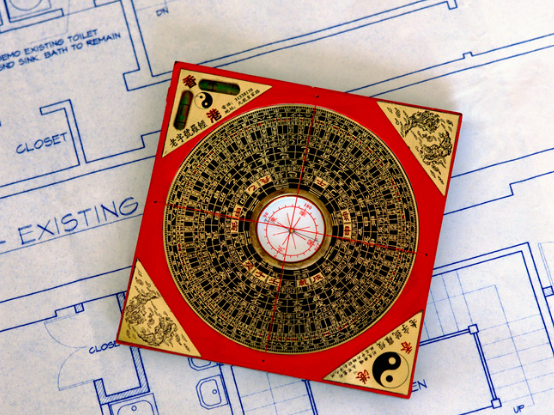
Should You Consider The Compass School When Styling A Bedroom?
While there is a lot to focus on when it comes to feng shui, the compass school is an extremely traditional form of thinking. Early examples of this method used a needle and bowl but over the years, it evolved to a complex system which provides a considerable amount of information.
It is possible to view the bagua in this system, bringing compass directions into the overview of the map, with actual North reflecting the North side of the floor map.
If you have an interest in this system, there is no reason why you cannot incorporate elements into your design and layout, but there is a lot to consider. This system not only focuses on the layout of the property, the direction your main door faces links top decisions you make in life. The system also ties in with the date and time of your birth, so if you are looking for a comprehensive system, this is well worth checking out.
However, there is no need to go this in-depth when it comes to creating a bedroom style that helps you achieve more from life.
Improve Sleep Patterns With The Best Sleeping Position
Finding the best sleep position is important, but difficult, especially when you share the bed with someone. What is good for romantic relationships might not be the best in aligning your room, so there will be times when you need to strike a balance in what is good for the energy of the bedroom, but also for the needs of the people sleeping here.
The most effective ways to enjoy a good night’s sleep includes the following factors:
Receiving proper support from a comfortable mattress
Using inviting fabrics made from comfortable material
Having a solid headboard behind you
These are all crucial components of enjoying a good night’s sleep but there is another critical factor to consider. You should attempt to fall asleep with your head pointing south. Feng shui scholars believe this creates positive energy, and ties in with the instruction not to sleep in the coffin position, or to place your bed directly in line with the bedroom door.
In this position, your feet face towards the door, with your body in the same position it would be in if you were dead and people were carrying your body away in a coffin.
Bedroom Feng Shui Principles Make A Big Difference In Banishing Negative Energy
When it comes to bedroom feng shui, knowing the difference between good and bad helps you remove negative energy. You don’t need to be a feng shui consultant to understand feng shui principles which promote positive energy. With a feng shui bedroom, you can enjoy restful sleep, balanced energy and feel content every time you shut your bedroom door.
With so much to consider when it comes to bedroom feng shui, it is easy to see why many people turn to a feng shui consultant. Anything which helps you enjoy restful sleep is worth considering, as the benefits of this are apparent in the short and long term.
Not every bedroom has equal space, or even the same wall space, so the solution for one household might not be a suitable solution for another house. This is why it is vital you consider what you need, and what is going to work best for you.
Just bought a leather sofa and you’re already regretting the colour? Or maybe your leather couch is faded, and needs some work to bring it back to the way it used to look? Either way, a colour change is in order, right?
So, how do you do it? Thankfully, the process is easy enough to do. Follow the advice in this guide and you’ll be able to transform your leather sofas in almost no time at all. Better yet, the advice here largely applies to all leather furniture, leather car seats, and even leather clothes. You might need different products, but the process is often the same.
Ready to find out how to change the color of your leather sofa? Then read on below!
Is It Really Possible To Change The Color Of Your Leather Sofas?
Yes! Changing your leather sofa from a boring old dark brown to a bright red is possible (or whichever colour you fancy, of course). Want a new dark color or a brighter, lighter color? Then it’s possible. You can transform your leather sofa with ease.
All you need is a leather colour in mind, the right products to achieve it, and the perfect process to follow, and you can re colour and re spray your furniture and completely change the way it looks!
Which Leather Furniture/Products Can Have Their Colour Changed?
All you need to do is ensure you have the right products for the job. Now, the process and products we’ll discuss below are deliberately general, and that’s because there are many different products out there that you can purchase for different types of leather. A semi aniline leather might need to be treated differently from other leather types, for example. Picking the right products for your leather is key.
So, a word of warning. Make sure you check the products you’re buying are appropriate for your leather sofa. And even if it says it is – ALWAYS patch test each product on a lesser seen area of your couch, so if anything goes wrong it won’t ruin the look of your entire couch.
With that warning out of the way, let’s take a look at the products you will need!
Leather Colour Change Products
Below is a list of everything you will need to achieve the perfect leather colour change:
leather cleaner
leather prep/etching fluid
sandpaper/abrasive pad
leather dye
leather sealant
applicator sponge/wool dauber
clean cloths
spray gun (optional)
hair dryer
cotton wool balls
repair kit (for creased and cracked areas where you might need to restore leather top coat – you can use this kit at around stage 3 of our how to guide below, making sure any patchwork is done before you dye the sofa)
gloves
drop cloths/tarp to protect surrounding area
masking tape
These products will ensure you have got the leather ready for the colour change, and allow you to follow the correct procedure for perfect results! You’ll also be able to buy the majority of them in one handy leather colourant kit, so make sure you shop sensibly so you don’t pay more than you have to as well. Many brands offer helpful kits with almost everything you need.
Step-By-Step Guide To Changing The Colour Of Your Leather Sofa
The right leather prep is crucial when changing the leather colour of any product or furniture, but especially so when you’re dealing with a piece as large as your leather sofa. So to achieve the perfect leather finish, you need to start well!
Before You Start
The key here is making sure that you and the area you are working in are both ready for the task at hand. That means making sure you wear gloves and clothes you don’t mind getting dirty. You’ll also need to use your protective coverings and masking tape to protect the area you’re working in from accidentally getting products on them that you don’t mean to. Excess dye is possible when applying dye to your sofa, so make sure it can’t drip anywhere like the floor.
Once the area and yourself are protected, you can get to work. Just make sure you do all of this in a well-ventilated area to prevent the build up of products as you work, especially if you’re using a spray gun to apply the products.
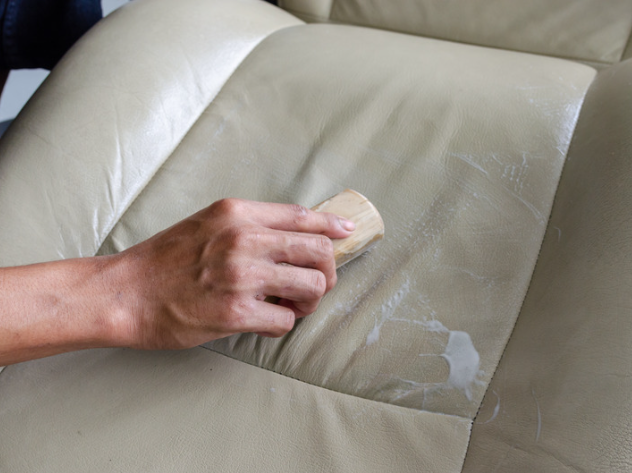
1: Leather Cleaning
You don’t want to create more stress for yourself when dyeing any leather, so the very first thing you should do is clean it. By cleaning the leather, you ensure that any old dirt or grime is removed, meaning the following products can stick to the leather much better, providing the perfect leather finish.
Start by applying a thin coat of leather cleaner. You can use bought products, like foaming cleaners designed specifically for leather, or simply make use of rubbing alcohol cleaner or soapy water. An alcohol cleaner works well, but be aware that foam cleaners tend to go deeper into the leather than a standard alcohol cleaner to lift the dirt and grime right off. If your leather colour is particularly marred by dirt, then a foam cleaner might be best.
When used in a correct and sparing way, you’ll notice that overtime the cloth you use to wipe over the sofa with the cleaner will eventually wipe away clean. When this happens, stop using the cleaner. You might only need to pour a small amount of the cleaner on to the cloth to see this result, or you might need multiple coats. Just keep going until the cloth wipes away clean.
Just apply light pressure or use a soft cleaning brush to help work the product into the sofa if you aren’t applying with an applicator sponge or cloth. Whatever you use will yield just as successful results. The key here is getting the leather clean to start with.
2: Sanding The Leather
Once clean, it’s time to sand. You’ll need to completely cover all areas of the couch here, from seating cushions to the backrest. The reason sanding the leather is a good idea here is that it helps remove the old manufacturers finish. Any satin finish, matt finish, or gloss finish can be a nightmare when trying to colour change leather, because it acts as a sort of shield against dye.
Don’t apply too much pressure as you rub the leather with your sanding paper (make sure the sanding paper is fine, too), you’re simply trying to make the leather more susceptible to subsequent coats of product you’ll use below. Just give the leather a light sanding, working a little harder on any distinctive creases, and eventually the slight shine of the manufacturers finish will fade, and you’ll know it’s time to move on.
3: Etching/Prepping Fluid
After finishing sanding the leather, it’s usually a good idea to use leather cleaner again to remove any of the debris. A cloth dampened in alcohol cleaner is a great idea here because it’ll help the fine bits of sanded leather stick to the cloth to be discarded.
Once completely clean and completely dry, you can move on to the etching or prepping fluid (some manufacturers use different terms – essentially the product is a leather prep fluid designed to act as a primer for the other products to come – whilst also helping remove the rest of the old finish).
It’s really important that you find the right leather prep fluid though. Using something that’s too strong can result in damage to your leather – so it’s really important you patch test this product too.
When you’re happy with the product you’ve picked out, simply evenly coat your sofa with the leather prep fluid. Then dry it thoroughly with a hair dryer, and apply several coats, drying between each application.
By using more coats of the prepping fluid, you can guarantee that the other products you’ll use to get a different colour for your leather will work better, providing you with a better finished product too.
From this point on, all of the products will need a base coat, followed by a second coat, and sometimes more before a final coat. Always apply in thin layers, because the aim here is to build the products up for the colour change. Consult your product information on the bottle of the prepping fluid to determine how many coats you will need to apply after the first coat.
A great way to use the leather prepping fluid (designed to further remove the previous sealant and leather finish) is with two cotton wool balls and an abrasive pad. This will ensure the product works into the leather well. As soon as pigment shows on the cotton wool and abrasive pad, stop. This is a sign that the leather finish has come away, and the sofa is ready for the first coat of dye.
Once you’ve used the leather prep, wipe the chair down again with a cleaner once dry. Ensure the couch is dry again before moving onto the leather dye.
4: Leather Dye Application
Whether it’s a light color or a darker color, the key to a successful color change is in the building of the colour. One coat won’t do it.
If you’re using a spray here, it’s more important than ever to ensure the surrounding area is protected and the area you’re working in is well-ventilated.
Apply the first layer of leather dye with a cloth or spray, making sure it’s a thin coat. Use a hair dryer to help it dry completely. If it looks patchy, don’t worry. You still need to build more colour.
Simply repeat the process as many times as needed until the leather has achieved the desired colour. There’s no telling how many coats this might take. If it’s a lighter finish you’re looking for, then you’ll need to apply less of the colourant than a darker finish, for example. The key here is to not go too far. You can always build more, but you can’t take dye away once it’s on.
As soon as your leather sofa looks like you want it to, stop. Then use a hair dryer to dry it once more.
5: Leather Finish
Now that the leather is looking the way you want it to, the only thing left to do is finish it with a sealant that’ll help protect the work you’ve done. Most people will opt for a matt finish here, but if you like the shine of a gloss or satin finish then look for a product that will provide this.
Simply apply the sealant or finisher using the product’s instructions. Again, you’ll need a few different applications, making sure you wipe in different directions each time to ensure a thorough coverage.
As soon as you’re happy with the finish and are satisfied that the work you’ve done is well protected, it’s time to stop.
All that’s left for you to do now is allow the whole project to set. This will take at least 24 hours. Ensure nobody uses the leather sofa, or car seats (whatever you’ve dyed) during this time. If they do, there may be some dye transfer and they could potentially ruin your hard work. As soon as the whole project is set, you can use the leather like usual.
Change The Color Of Your Leather Couch: A Review
Changing the colour of your leather sofa is so much easier than people first realise. If we were to provide a quick overview to help you remember, it would look a little something like this:
Clean your leather
Sand it down and use leather preparation fluid to help remove the old finish
Use leather dye slowly, in thin layers, drying in between each application until the leather looks as you want it to
Once happy, use a leather sealant to protect your hard work
It really is that easy. The real key to success, though, is finding the right products for the job. Remember to always patch test them before using on your couch, and always look for leather specific products designed for your type of leather.
But with the right products and our simple, easy to follow advice, you’ll have a transformed leather sofa in no time at all!
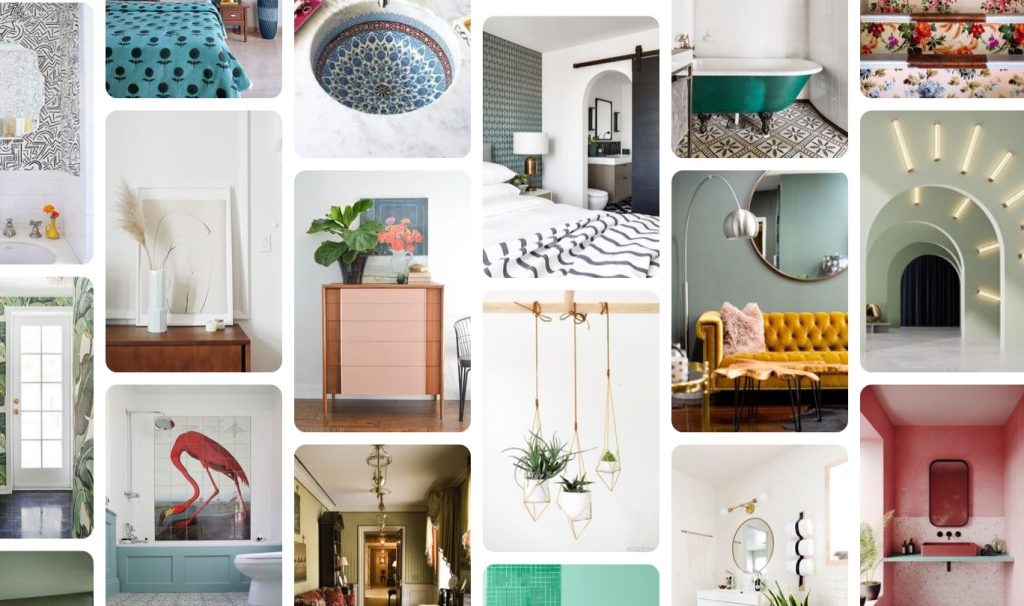
Mood boards are a mainstay of the design world. Beloved by interior designers, graphic designers, fashion designers, event planners, and more, mood boards are important elements of the design process for professional designers and artists alike.
Whether you’re taking your first step into the professional design world or you are starting a personal design project, learning how to make a mood board could help to boost your creativity and help you to achieve the perfect look.
What is a mood board?
You can think of a mood board as an inspiration board that collects and displays your inspirations and design ideas. The theme and structure and content of your mood board will vary depending on the type of project you are completing, its themes, and your inspirations. But generally, it is a collage of images, colour schemes, physical materials (if you are making a physical mood board), words, videos (if you are making a digital mood board), and more.
Why should I create a mood board?
Most creative professionals create mood boards at the very start of a creative project. This is because a mood board helps you to refine your own ideas into a cohesive visual representation.
Not only that but making a mood board can also help your creativity to grow. Inspiration can be found in the process of collating your ideas and it can help you to find different directions to take your design ideas. You might even end up in a completely different creative space than you thought you would be when you started the mood board, but that’s all part of the creative process.
For creative professionals, a mood board is also an important step to communicate ideas to clients. Imagery and tactile elements can help clients to get inside the designer’s mind and understand the theme, idea, and concepts that they are trying to paint.
It can be difficult to convey these ideas using descriptive words alone (although words can form part of a mood board) because they can’t fully capture the feel (or mood!) of the concepts in the same way that visual directions and images can.
What type of mood board should I use?
There are two main groups of mood board types: physical and digital. They both have their own strengths and which one you choose can be based both on personal preference and the demands of the project.
Physical mood board
Physical mood boards are the traditional way of creating mood boards. They are a literal board onto which you can pin or stick all of your different design elements.
The most popular way of making this type of board is to use a foam board. This is a strong and lightweight material that is common in the design world as backing in picture frames and to mount photos and prints, as well as to build architectural models.
Foam board can be difficult to work with because, while it is easy to cut it to the right size, you will need to use tools like scalpels, which is something that not everyone is comfortable with. With that being said, a foam board can be the perfect backing for a mood board because it is a neat, neutral space onto which images can be precisely stuck using an adhesive spray.
Another option is to use a corkboard or a drawing board and to pin your imagery onto the board. While this won’t be as precise as a foam board, a corkboard can add to your style and can convey a warmer and more accessible feel.
With a physical mood board, you can display your design elements in any way you like to create the perfect style for your project. Sometimes it may be better to have the elements neatly organised and spread out but for other projects, it can help to layer the elements on top of each other to make the display more eclectic and eye-catching.
One of the major benefits of using a physical board is that it allows you to convey textures by pinning or sticking the physical objects that you are inspired by directly onto the board. If you are presenting your projects to clients, this gives them the opportunity not just to look at your beautiful mood board but also to feel the physical elements with their hands. This can help to give them the emotional response to your ideas that you hope for. These types of mood boards are particularly common for an interior design project although they are also used in other design fields.
Digital mood boards are becoming much more popular in recent years because of how common digital devices are and because of the wide range of digital mood board editing software available. These types of mood boards are particularly common in the graphic design world although they are also used in interior design, fashion, and more.
One of the main benefits of digital boards is that they can be endlessly edited and modified in seconds. With a physical board, you have to unpin the design elements and re-pin them and the process can get quite fiddly but with a digital mood board, you can simply drag and drop, and even resize the images to create the perfect collage.
Another benefit of digital boards is that you can share them in an instant with clients or people who are collaborating on the project with you. This allows everyone to view and even edit the mood board if they want to.
Digital mood boards also give you the option of including YouTube videos, gifs, and music. You can also make your mood board dynamic by including transitions. This is a whole new direction for mood boards and these sorts of design elements can be extremely effective in creating a vibe and an emotional response in the viewer.
A lot of people have a Pinterest board for all sorts of different projects. And they might not even realise that they are making a mood board. Of course, the type of mood board that you can create within Pinterest is relatively limited from a design point of view but it can be a great tool for collecting ideas that have inspired you from all over the internet. And you can have people collaborate with you on the board so that you can put all of your ideas together.
Pinterest is a free website that makes the initial stage of looking for inspiration far easier so it can be an important first step if you are planning on finding images and ideas from the internet.
Milanote is a popular visual note taking software that can be used to create mood boards. The interface is entirely drag-and-drop and it is easy to move things around and add new inspiration ideas from the internet.
Another benefit is that you can include text notes, stacked images, and you can play around with drawing. You can also collaborate easily with other people. With that being said, Milanote isn’t specifically a mood board software. It is a visual note-taking software. So this means that some of the more design-heavy elements are missing from it.
Canva, on the other hand, is specifically designed to help you to create a mood board. They have a wide variety of mood board templates in different styles, which can help you to save time with creating your mood board and that can help you ensure that your board has a consistent look.
Canva also has a library of graphic design elements that you can add to your mood board easily, and it is simple to upload your own photos, artwork, and text. You can also collaborate easily with your team. Canva has a free version that is suitable for individuals and small teams but there are also paid plans with extra editing tools and the ability to collaborate with more people.
Adobe Illustrator has a wide range of free template options for mood boards via Adobe Creative Cloud Express. The Adobe Illustrator templates contain a wide range of images and colour schemes but you have complete creative control to add your own images, resize images, add components, colours, filters, change the transparency of different components, and more.
If you use text, you will be pleased to know that Adobe Illustrator uses a “magic layout function” that ensures that your text moves with your design and images so you can see immediately exactly what it will look like.
A step-by-step guide to creating your own mood board
Get inspired
The very first step to creating any mood board is to find your inspiration. Don’t rush through this part of the process because the key to making a beautiful mood board is to find your style and theme for the project and capture its point and mood perfectly.
If you aren’t yet sure what your theme is then your mood board will reflect that and it may look confused and muddled. If you intend to use your mood board to communicate your idea to a client or your collaborators then they won’t be able to understand your idea if your mood board is too haphazard.
If you are designing for an existing brand, or if you are creating your brand, then it is important to think about the brand qualities as part of your mood board brainstorming.
You can pull your inspiration from anywhere. Of course, the internet is a valuable tool, especially for digital boards, but you shouldn’t limit yourself to just Google searches or scrolling view a Pinterest board (or 20!).
You can take inspiration from books, the furniture and colour schemes in your home, nature, architectural features that you notice when you’re out walking, vintage illustrations in magazines, art galleries, museums…you get the picture!
In fact, with camera phones in everyone’s pockets, you should go ahead and get that picture whenever you feel any inspiration. It doesn’t matter what it is that has sparked your interest, take a photo. Or if it is something small, you could even use the physical object as part of your physical board. And you can use the story of your how it helped to spark your creativity as part of your mood board story.
Get stuck in to create your mood board
You’ve collected a stack (physical or digital) of everything that got your creative juices going so now’s the time to actually make your mood board. And it is at this point that you have to become more of a curator than a collector. Not everything that you collected along your journey can be included on your mood board so you are going to have to be selective.
This can often be the most difficult part of the process but it is in some ways the most important because it is at this point in the project that you start to capture the essence of your design and theme. Try to find some clarity in your point of view and don’t be afraid to mix unusual images and textures together, or to take some away if the imagery/colour palette/style doesn’t fit.
Create multiple mood boards
If you are in the middle of an interior design project and you are designing more than one space, it can be useful to create multiple mood boards. This can help you to see if your colour palettes, imagery, brand, and style flow nicely through the interior.
Don’t be afraid of text
While it’s true that a picture paints a thousand words, sometimes finding the right word or two to add to your mood board can help to create and communicate the feel or brand that you are trying to convey.
Different typography can also help to create the right vibe. Street sign text can help to create an industrial image, retro text can help to create a vintage image, comic sans text can help to create a fun image, etc.
If you are making a physical board, you can add textures using physical objects. These are commonly fabric swatches but you can use anything you like. If you come across an interesting pattern or texture that adds to the image you are making, stick it to your board. The more material you can find that helps to capture the image you are making, the better the viewer will be able to understand it.
Use a photo editor
When you need to create mood boards, photos are always going to be one of your go-to images. Whether they are your own photos (digital or physical) or photos that you have found in a book or on the internet, they are one of the best ways of bringing your style ideas to life.
Spending some time photo editing can help to clarify the image that you are trying to portray. This could include thoughtful cropping, adjusting the colour theme to better fit your brand or idea, or even adding stylistic components. There are lots of free photo editors out there if you don’t have a paid version.
Have a clear colour scheme
One of the crucial components of mood boards is your colour scheme. Colours are extremely effective at evoking a certain emotion and for giving your viewer a clear sign of what your brand or idea is.
Having an understanding of colour theory can, of course, help. But if you haven’t studied it, that doesn’t mean that your colour scheme is necessarily going to be a mess. It is more important that you make sure that the theme is consistent and clear across your images and other components.
Think about having a test audience
Whenever you create mood boards, there can be a tendency to get stuck in your head. Bringing other people into the process and having them look over your board can very quickly demonstrate to you whether your ideas work or if they aren’t communicating exactly what you hoped they would.
Some of your images might not make sense in the way you thought they did, or your brand/theme might not be as obvious as you imagined. Either way, using your family and friends as a free and happy-help-test audience can be just what you need to edit your mood board to bring it back in line with your ideas.
Have an anchor or anchors
It is a fact of life that humans find it easier to make sense of something if there is an anchor point that they can focus on. Having a central image from which your other images and components branch off can help to sign-post your viewer to the core ideas of your theme.
Of course, choosing the perfect anchor is key to getting this part of your mood board creation right but often this is something that happened naturally. You can use the original image or images that started off the design or you can find something that encapsulates those original ideas. Even using a bold and prominent word can be enough to help people understand everything else that you have presented.
The bottom line
Mood boards not only help you to clarify your thinking and help you to focus your design but they can also help to ensure that any of your collaborators or clients can quickly get on the same page as you so that you can work together to implement or edit your ideas. Once you get the hang of creating mood boards, it can become one of the most rewarding and inspiring parts of your design process.